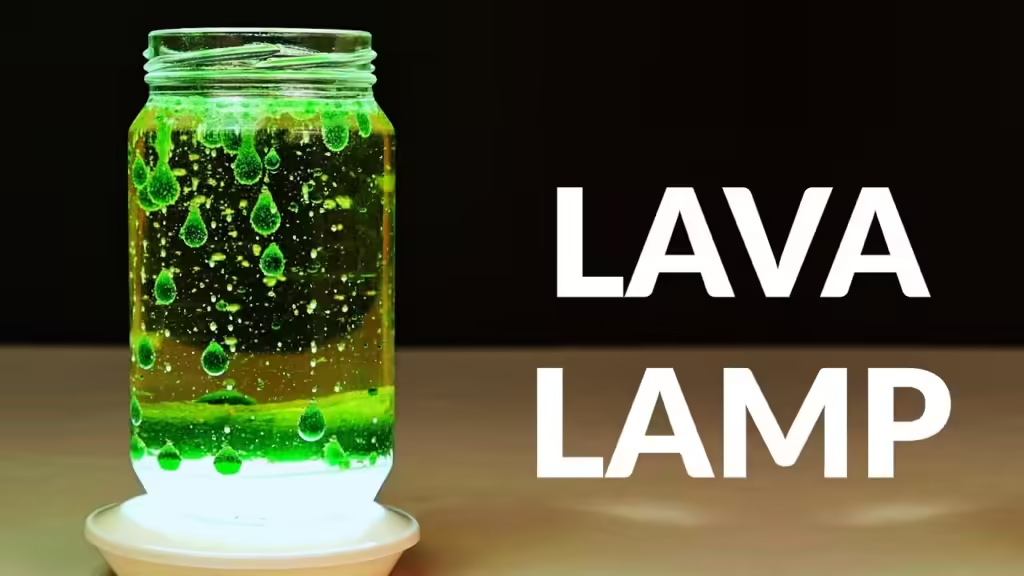
How To make a lava lamp at home, fill a clear bottle with water and oil, then add food coloring and an effervescent tablet. Creating a lava lamp at home is a fun and educational DIY project.
It allows you to explore the fascinating interplay between different liquids and effervescent reactions. You only need a few simple ingredients: a clear bottle, water, vegetable oil, food coloring, and an effervescent tablet like Alka-Seltzer. This activity is perfect for kids and adults alike, offering a visually captivating experience.
The oil and water do not mix, creating a mesmerizing display when the effervescent tablet reacts. This guide will walk you through the steps, making it easy to create your own lava lamp.

Credit: www.madetobeamomma.com
Materials Needed
Making a lava lamp at home is fun and easy. Before you start, gather all the materials you need. This section will guide you through the necessary supplies.
Gathering Supplies
First, you need to gather all the supplies. Here is a list of items you will need:
- Water – Tap water will work fine.
- Vegetable Oil – Any brand will do.
- Food Coloring – Choose your favorite colors.
- Effervescent Tablets – Alka-Seltzer or similar brands.
- Clear Bottle or Jar – Ensure it is clean and dry.
Choosing The Right Container
Choosing the right container is crucial for your lava lamp. A clear bottle or jar works best. Ensure the container is transparent for optimal viewing.
| Container Type | Pros | Cons |
|---|---|---|
| Glass Bottle | Clear, durable | Heavy, breakable |
| Plastic Bottle | Lightweight, unbreakable | Less clear, can scratch |
| Glass Jar | Wide mouth, clear | Heavy, breakable |
Pick a container that suits your needs. A glass bottle or jar is best for clarity. Make sure it is clean and dry before use.
With these supplies, you are ready to create your lava lamp. Follow the next steps to start making it.
Preparing Your Workspace
Before making a lava lamp, prepare your workspace. This ensures a smooth and safe experience. Follow these steps to set up a safe area and organize your materials efficiently.
Setting Up A Safe Area
Choose a flat and stable surface. Ensure the area is clean and dry. Clear any unnecessary items from the workspace. This helps avoid spills and accidents.
Set up your workspace in a well-lit area. Good lighting helps you see clearly. Keep a towel or cloth nearby for any spills. This makes clean-up easier.
Ensure kids and pets are not near the workspace. Safety is important. Always supervise children during this activity.
| Safety Tips | Reason |
|---|---|
| Flat Surface | Prevents spills |
| Good Lighting | Better visibility |
| Keep Pets Away | Ensures safety |
Organizing Your Materials
Gather all necessary materials before starting. This makes the process smoother. Here is a list of items you need:
- Clear bottle or jar
- Water
- Vegetable oil
- Food coloring
- Alka-Seltzer tablets
- Funnel
- Measuring cup
- Spoon
Place each item within easy reach. This helps avoid interruptions. Use a tray to keep materials together. This keeps your workspace organized.
Measure the water and oil beforehand. This saves time and ensures accuracy. Pour the liquids into separate containers. Label them if necessary.
Break the Alka-Seltzer tablets into small pieces. This makes them easier to use. Store them in a small bowl or container.
Organizing your materials helps make the lava lamp easily. It also ensures a fun and stress-free experience.
Creating The Base Mixture
Making a lava lamp at home is a fun and educational activity. The first step is creating the base mixture. This mixture is essential for the mesmerizing effect of the lava lamp.
Mixing Water And Oil
Start by gathering the following materials:
- 1 cup of water
- 1 cup of vegetable oil
- A clear glass or plastic bottle
First, pour the water into the bottle. Next, add the vegetable oil. Notice how the oil floats on top of the water. This happens because oil is less dense than water.
Adding Food Coloring
Choose your favorite color of food coloring. Add 10 drops to the bottle. Watch as the food coloring passes through the oil and mixes with the water. The oil and water remain separate, creating a beautiful effect.
| Materials | Quantity |
|---|---|
| Water | 1 cup |
| Vegetable Oil | 1 cup |
| Food Coloring | 10 drops |
Now you have your base mixture ready. Your lava lamp project is taking shape.
Adding The Effervescent Tablet
Creating a lava lamp at home is a fun and easy project. The magic happens when you add an effervescent tablet. This step is crucial for bringing your lava lamp to life. Let’s break down the process into simple steps.
Breaking The Tablet
First, take your effervescent tablet. These tablets are usually large. You need to break it into smaller pieces.
- Hold the tablet firmly.
- Use your fingers to snap it in half.
- If needed, break it into more pieces.
Smaller pieces dissolve faster. This makes the lava lamp more exciting.
Adding It To The Mixture
Now, it’s time to add the tablet pieces to the mixture. Follow these steps:
- Make sure your bottle is ready.
- Drop one piece of the tablet into the bottle.
- Watch closely as bubbles start to form.
The effervescent tablet reacts with water. This creates bubbles that make the oil move. Your lava lamp starts to come alive!
For a continuous effect, add another piece after the first one dissolves. Repeat this process to keep the lava lamp active.
Enjoy the colorful and mesmerizing effect of your homemade lava lamp. It’s a great way to understand simple science at home.
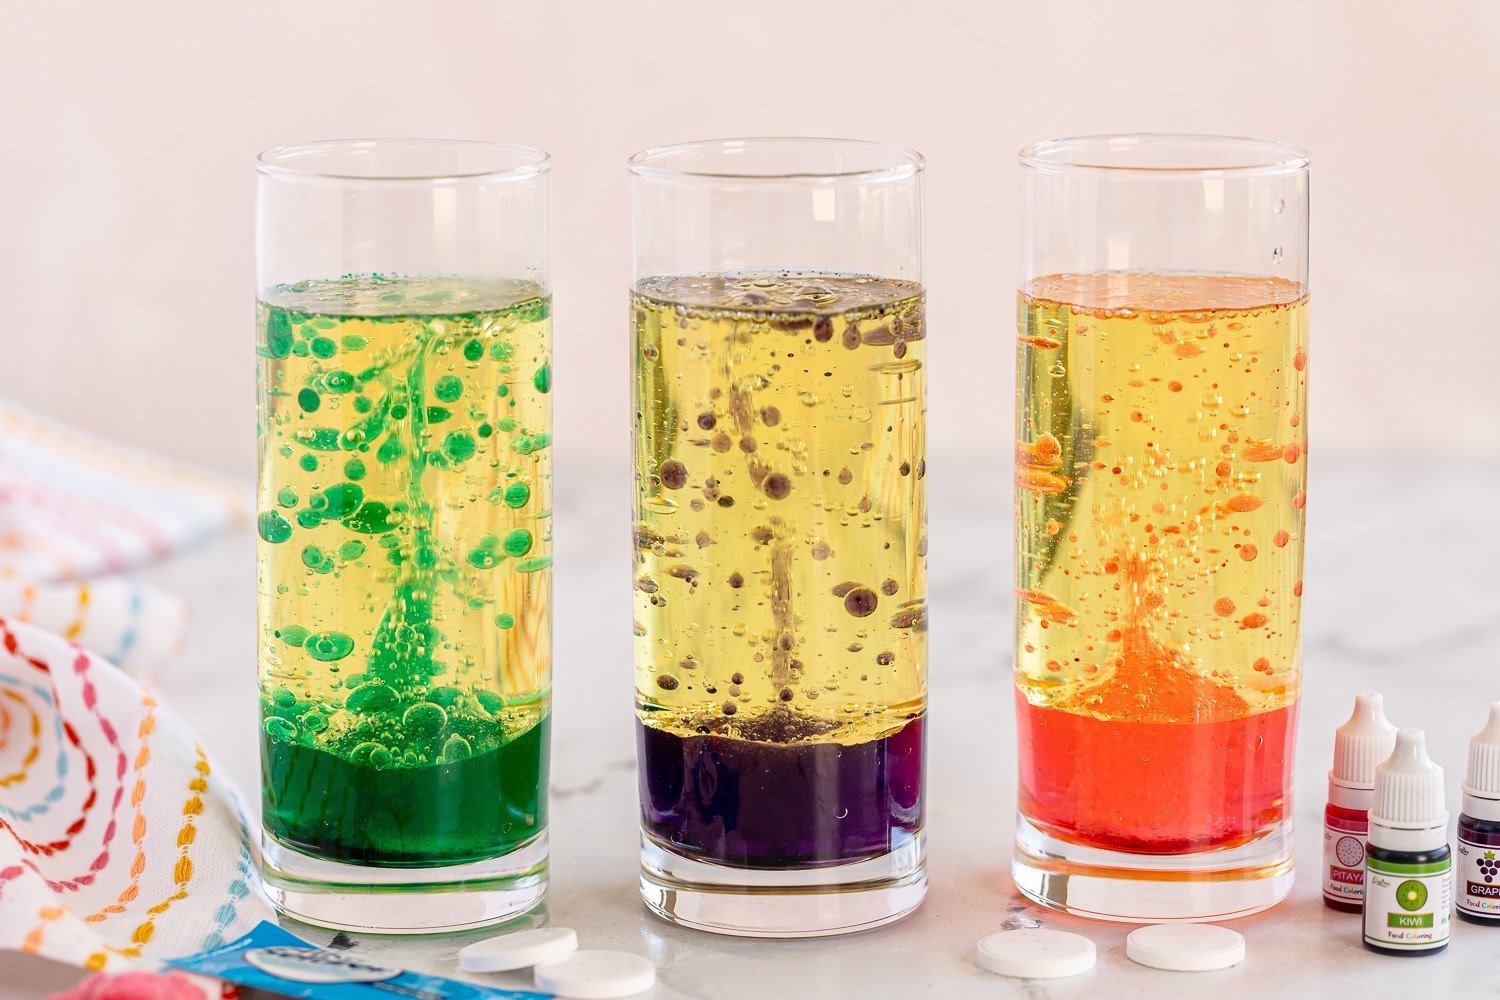
Observing The Reaction
Observing the reaction in your homemade lava lamp is fascinating. This part lets you see science in action. Watching the colorful blobs dance can be mesmerizing and educational.
Initial Changes
Right after you assemble your lava lamp, you’ll see initial changes. The tablet starts to dissolve in the water. This creates bubbles of gas.
- The gas bubbles rise through the water.
- They carry bits of oil with them.
- The oil and water do not mix.
The oil blobs float to the top. Then, they sink back down. This creates the iconic lava lamp movement. The colors mix and swirl beautifully.
Long-term Observations
Over time, you will notice long-term observations. The reaction will slow down as the tablet dissolves completely.
- The bubbles become less frequent.
- The oil blobs settle at the bottom.
- The colors might start to fade.
You can restart the reaction easily. Just add another tablet. This will make the lava lamp come to life again.
Here’s a quick reference table for observing reactions:
| Observation | What to Expect |
|---|---|
| Initial Changes | Fast bubbles, oil blobs rising, colorful swirls |
| Long-Term Observations | Slower bubbles, oil settling, color fading |
Enhancing Your Lava Lamp
Making a lava lamp is fun, but enhancing it can be even more exciting! By adding extra elements like glitter and glow-in-the-dark items, you can make your lava lamp truly unique. Let’s explore some easy ways to enhance your homemade lava lamp.
Using Glitter
Glitter adds sparkle to your lava lamp. It catches the light beautifully. Follow these simple steps to add glitter:
- Choose your favorite glitter color.
- Add a small spoonful of glitter to your lava lamp.
- Stir gently with a stick or spoon.
The glitter will float and create a magical effect. Kids and adults alike will love the shiny look!
Adding Glow-in-the-dark Elements
Glow-in-the-dark items make your lava lamp amazing at night. They charge up with light and glow in the dark. Here’s how to add them:
- Buy glow-in-the-dark paint or stickers.
- Paint small stones or use stickers.
- Place them inside your lava lamp.
Turn off the lights, and watch your lava lamp glow! It’s perfect for bedtime or parties. The glow-in-the-dark feature adds a cool twist to the classic lava lamp.
These enhancements make your lava lamp stand out. Whether you add glitter or glow-in-the-dark elements, your lava lamp will be a hit!
Troubleshooting
Making a lava lamp at home is fun, but sometimes issues arise. Here, we will discuss common problems and their solutions. This guide will help ensure your lava lamp works perfectly.
Common Issues
| Issue | Description |
|---|---|
| Lava Not Rising | The blobs stay at the bottom. |
| Cloudy Water | The water looks murky. |
| Too Many Bubbles | Excessive small bubbles are seen. |
Quick Fixes
- Lava Not Rising:
- Check the temperature of the water.
- Add more salt to increase density.
- Stir gently to mix the oil and water.
- Cloudy Water:
- Use distilled water to replace the cloudy water.
- Clean the jar with soapy water and rinse well.
- Ensure no soap residue remains before refilling.
- Too Many Bubbles:
- Let the lamp sit undisturbed for a few hours.
- Reduce the amount of detergent used.
- Gently stir to release trapped air.
Following these steps will help solve most issues. Enjoy your homemade lava lamp!
Safety Tips
Creating a lava lamp at home is a fun project. Ensuring safety is crucial. Below are some essential safety tips to follow while making your own lava lamp.
Handling Chemicals
Household ingredients such as oil and water are safe to use. If you use food coloring, avoid getting it on your skin. Alka-Seltzer tablets are often used for creating bubbles. Handle them with dry hands.
Keep a clean workspace. Use gloves if you handle any strong chemicals. Always read labels on all ingredients you use.
Child Safety Considerations
If children are involved, adult supervision is a must. Ensure kids understand the importance of safety. Use child-safe materials like vegetable oil and water.
Keep small parts like caps and tablets out of reach of toddlers. Teach children to wash their hands after the activity. Make sure the work area is clutter-free to prevent accidents.
| Item | Safety Measure |
|---|---|
| Food Coloring | Use in small amounts, avoid skin contact |
| Alka-Seltzer Tablets | Handle with dry hands, keep away from mouth |
| Small Parts | Store away from children |
- Always supervise children during the activity.
- Use non-toxic materials whenever possible.
- Keep a first-aid kit nearby.
- Set up a clean workspace.
- Gather all ingredients.
- Explain safety rules to children.
- Start the lava lamp activity.
Cleaning Up
After creating your lava lamp, it’s important to clean up. This ensures your workspace stays tidy and safe. Follow these steps to dispose of materials and clean your workspace effectively.
Disposing Of Materials
Proper disposal of materials is crucial. Here’s how you can do it:
- Oil and Water Mixture: Pour the mixture into a sealable container. Dispose of it in the trash. Do not pour it down the sink.
- Food Coloring: Wash out any food coloring with warm, soapy water. This prevents stains on surfaces.
- Plastic Bottles: Clean and recycle the plastic bottles. They are usually accepted in most recycling programs.
Cleaning Your Workspace
Maintaining a clean workspace helps for future projects. Follow these steps:
- Wipe Down Surfaces: Use a damp cloth to wipe down all surfaces. This removes any spills or residue.
- Wash Tools: Clean all tools used with warm, soapy water. Dry them thoroughly before storing.
- Check for Stains: Inspect your workspace for any stains. Use a mild cleaner to remove them.
| Material | Disposal Method |
|---|---|
| Oil and Water Mixture | Sealable container in trash |
| Food Coloring | Warm, soapy water |
| Plastic Bottles | Recycle |
Credit: www.youtube.com
Alternative Methods
Creating a lava lamp at home is a fun and educational activity. There are several alternative methods to make it unique and exciting. Let’s explore some creative ways to customize your lava lamp.
Using Different Oils
Instead of using the usual vegetable oil, try different oils. Each oil offers unique properties and effects.
- Baby Oil: It creates a smooth and clear lava lamp. Baby oil is less dense than vegetable oil.
- Mineral Oil: This oil is also clear and gives a mesmerizing effect.
- Olive Oil: Olive oil creates a slightly yellowish glow, adding warmth to the lamp.
Using various oils can change the appearance and movement of the blobs. Experiment with different types to see which you like best.
Experimenting With Colors
Colors play a significant role in how your lava lamp looks. Here are some ways to experiment with colors:
- Food Coloring: Add a few drops of food coloring to the water. This will make the blobs stand out more.
- Neon Paint: Use a small amount of neon paint for a vibrant effect. Neon colors glow under blacklight.
- Glitter: Add some glitter to the water for a sparkling effect. Glitter will float and move with the blobs.
Changing the colors can make your lava lamp look magical and unique. Mix and match colors to create your desired effect.
Incorporating Science
Creating a lava lamp at home is not only fun but also educational. This project incorporates basic scientific principles, making it an excellent learning opportunity for kids and adults alike. By understanding the chemistry and the educational benefits, you can turn a simple craft into a valuable science lesson.
Explaining The Chemistry
A homemade lava lamp uses simple chemistry to create its mesmerizing effects. The key ingredients are oil, water, and an effervescent tablet like Alka-Seltzer. These items work together to produce the moving blobs inside the lamp.
Water and oil don’t mix because they have different densities and polarities. Water is denser and sinks to the bottom, while oil floats on top. When you add an effervescent tablet, it reacts with water to produce carbon dioxide gas. This gas forms bubbles that rise through the oil, carrying some water with them. Once the bubbles reach the top, the gas escapes, and the water sinks back down. This cycle creates the classic lava lamp effect.
Educational Benefits
Making a lava lamp at home offers numerous educational benefits. Kids can learn about density, polarity, and chemical reactions in a fun and engaging way.
- Density: Understand why oil floats on water.
- Polarity: Learn why water and oil don’t mix.
- Chemical Reactions: Observe how effervescent tablets produce gas.
This project encourages curiosity and hands-on learning. It’s a great way to introduce young minds to basic scientific concepts.
For parents and educators, using a lava lamp as a teaching tool can be very effective. It’s visually captivating and easy to explain, making complex concepts more accessible.
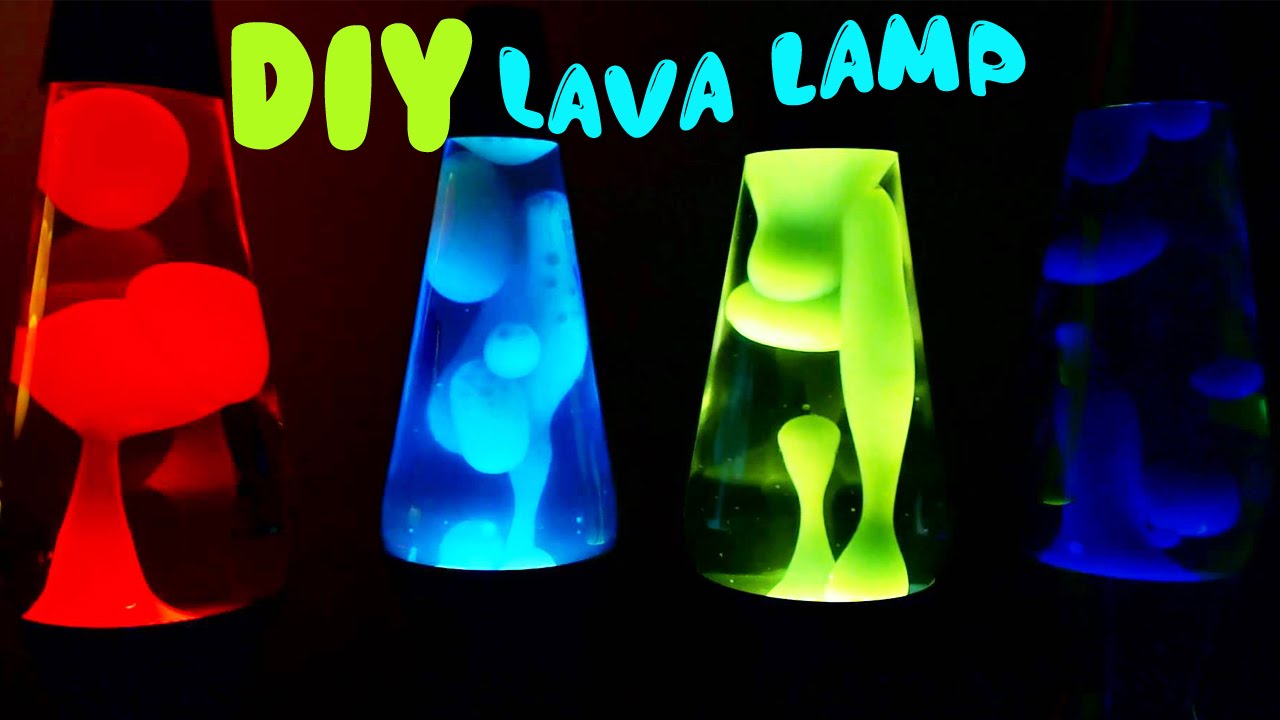
Creative Variations
Creating a lava lamp at home is a fun and educational activity. But why stop at the basic design? With a bit of creativity, you can make themed lava lamps and holiday-inspired designs. Explore some creative variations to make your lava lamp truly unique.
Themed Lava Lamps
Choose a theme that excites you. Here are some ideas:
- Galaxy Lava Lamp: Use blue and purple food coloring. Add glitter stars for a cosmic effect.
- Ocean Lava Lamp: Combine blue food coloring with plastic sea creatures. This creates an underwater scene.
- Fairy Tale Lava Lamp: Use pink and green colors. Add small fairy figurines and glitter.
Make sure to use safe materials. These themed lava lamps can be a great way to express creativity. Perfect for kids’ rooms or themed parties.
Holiday-inspired Designs
Celebrate the seasons with holiday-inspired lava lamps:
| Holiday | Design Idea |
|---|---|
| Christmas | Red and green colors with small ornaments and glitter. |
| Halloween | Orange and black colors with plastic spiders and bats. |
| Easter | Pastel colors with tiny plastic eggs and bunnies. |
These designs add festive cheer to your home. They make excellent decorations and are fun to create with family.
Sharing Your Creation
After successfully making your own lava lamp, the fun doesn’t stop there. Sharing your creation can be just as exciting. Whether you want to show off your skills or inspire others, documenting and sharing your lava lamp is a great way to connect with friends and family.
Taking Photos
First, set up a good background. A plain background works best for highlighting your lava lamp. Natural light helps too. Place your lamp near a window for clear, bright photos. Use a camera or a smartphone with a good resolution. Capture different angles and close-ups to show the details.
Here are some tips for taking great photos:
- Avoid using flash as it can create glare.
- Use a tripod to keep your camera steady.
- Experiment with different lighting, like night shots with the lamp glowing.
Posting On Social Media
Social media is a fantastic platform to share your lava lamp. Choose your favorite platform, whether it’s Instagram, Facebook, or Twitter. Write a catchy caption to grab attention. Use hashtags like #LavaLampDIY and #HomeScience to reach a larger audience.
Follow these steps to make your post stand out:
- Upload the best photos you took.
- Add a brief description of how you made the lamp.
- Tag friends who might find it interesting.
- Engage with comments and questions from your followers.
Sharing your creation not only showcases your hard work but also inspires others to try it out. So, go ahead and let the world see your awesome lava lamp!
Credit: www.madetobeamomma.com
Frequently Asked Questions
What Is The Best Oil For Homemade Lava Lamp?
The best oil for a homemade lava lamp is mineral oil. It’s clear, safe, and works effectively with water-based solutions.
How To Make A Homemade Lava Lamp With Baking Soda And Vinegar?
To make a homemade lava lamp, fill a glass with water. Add food coloring. Pour in vegetable oil. Add baking soda. Slowly add vinegar. Enjoy the effect.
What Is The Secret Ingredient In Lava Lamps?
The secret ingredient in lava lamps is a combination of wax and water. Wax heats up, creating mesmerizing blobs.
How Long Does A Diy Lava Lamp Last?
A DIY lava lamp typically lasts a few hours. The oil and water mixture can be reused for multiple sessions. For best results, refresh the mixture occasionally.
What Materials Do I Need For A Lava Lamp?
You need water, oil, food coloring, and Alka-Seltzer tablets.
How Long Does A Homemade Lava Lamp Last?
A homemade lava lamp can last for several hours.
Can I Use Any Type Of Oil?
Vegetable oil or baby oil works best.
Is Making A Lava Lamp Safe For Kids?
Yes, with adult supervision, it’s safe for kids.
Can I Use Different Colors?
Yes, you can use any food coloring.
Why Does The Oil Float On Water?
Oil is less dense than water, so it floats.
Conclusion
Creating a lava lamp at home is simple and fun. This project can be done with basic materials. It’s a great way to explore science and creativity. Enjoy making your own mesmerizing lava lamp and watch the colors swirl. Share this activity with friends and family for added fun.